Introduction
1. What is Concelaed Toilet Cistern?
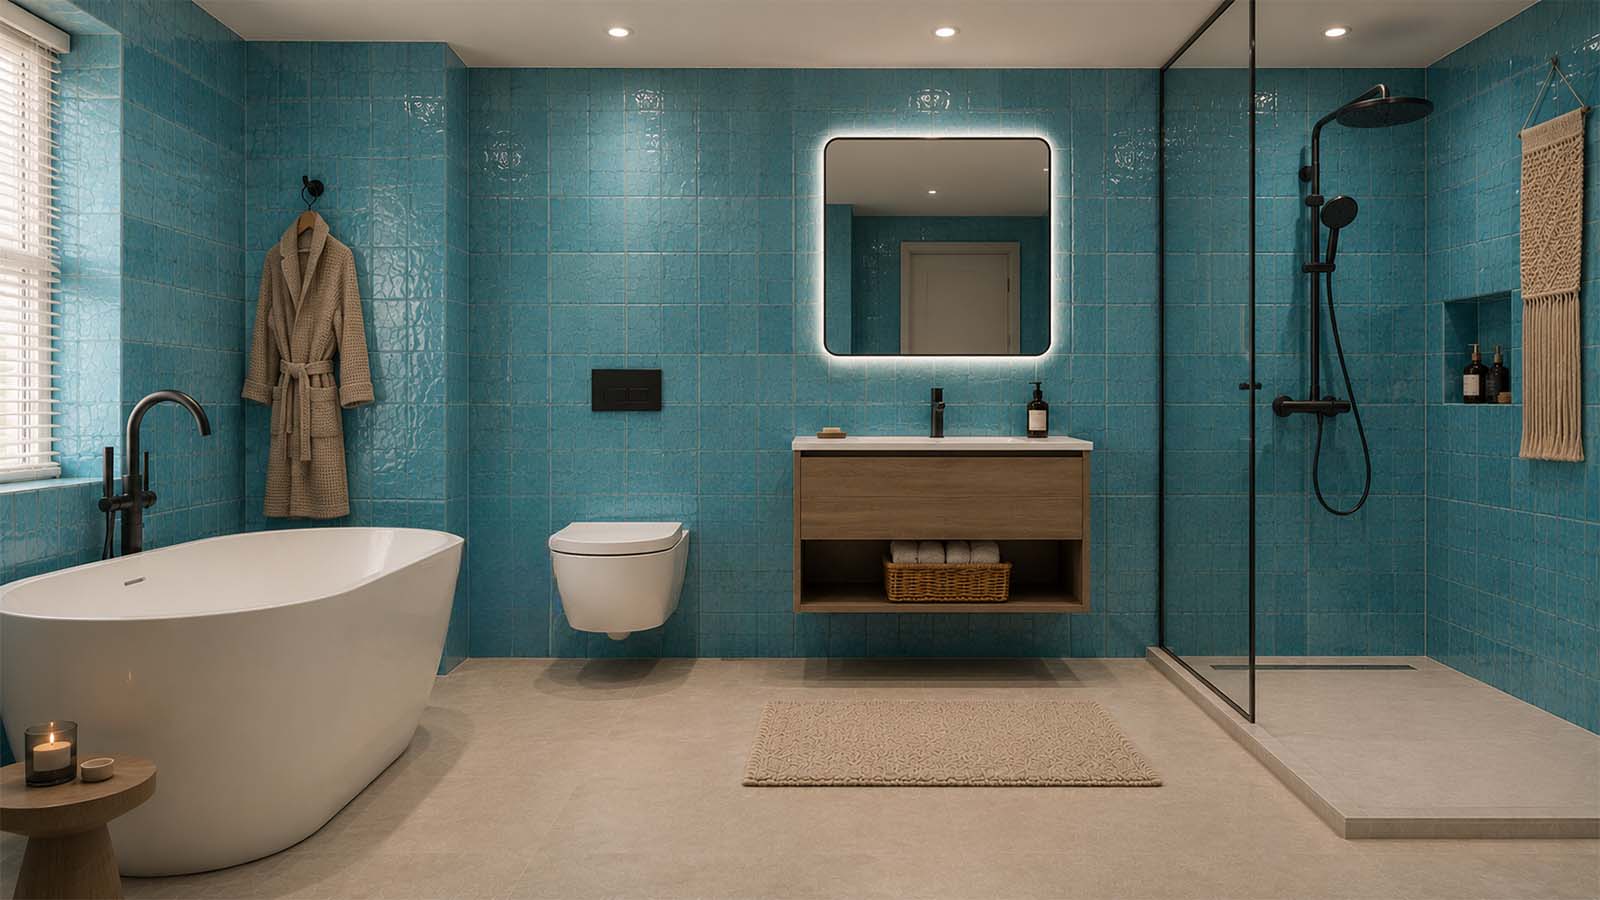
A concealed toilet cistern is the water tank of a toilet that sits completely out of sight — built into a wall cavity, a stud partition, or a bathroom furniture unit — leaving only the pan and a slim flush plate on display. Depending on where you live, you'll see the same product described in different ways: a hidden toilet cistern or concealed WC cistern in the UK, an in wall toilet cistern or in-wall toilet tank in the US, and an installation cistern across much of Europe. The terminology changes, but the job doesn't. Like any cistern, it stores the measured volume of water released on each flush — typically a 6/3 litre dual flush on UK and European models, or around 1.28 gallons (4.8 litres) on a US WaterSense toilet.
2. How it differs from a traditional exposed cistern
The obvious difference is visual, but there's a structural one that matters far more when you're choosing a product. A traditional close-coupled toilet uses a ceramic cistern bolted directly onto the back of the pan, with the pan resting on the floor and carrying all the weight. A concealed setup splits those two jobs apart. A slimline plastic cistern handles the water, while a separate steel support frame — called a mounting frame in the UK and Europe, and a carrier or carrier system in the US — is fixed to the floor and wall to bear the full load of the pan and the person using it.
This is the key point most guides skip: with a concealed cistern, the frame does the heavy lifting, not the floor. That's exactly why a hidden toilet cistern is almost always paired with a wall-hung or back-to-wall pan, and why you're really buying a system (cistern + frame + flush plate) rather than a single fixture. It also explains two practical benefits — the flush is noticeably quieter because the wall muffles it, and the flush plate becomes your only visible control, making it the one design choice you'll see and touch every day.
3. Why concealed cisterns are so popular in modern bathrooms
Their popularity across the UK, Europe and the US comes down to three things. Space — hiding the tank frees up real and visual room, which is why an in wall toilet cistern is a go-to solution for small bathrooms, en-suites and cloakrooms. Cleaning — with no exposed tank or pipework behind the toilet, there are far fewer awkward gaps where dust, grime and mould collect, and a wall-hung pan lets you mop straight underneath.
4. Where concealed cisterns are commonly installed
In practice, you'll find a hidden toilet cistern fitted in one of these locations:
- Inside a stud partition wall — the most common choice in renovations and new builds, where the frame sits within the timber or metal studwork before the wall is boarded and tiled.
- Behind a false or duct wall — a shallow built-out wall (often called an IPS panel or duct in commercial settings) that hides the cistern along with the water and waste pipes.
- Within a furniture or WC unit — a self-contained cabinet that conceals the cistern without building into the wall, ideal for solid-wall homes where cutting into the wall isn't practical.
- Under a window or in an alcove — using a low-height frame to keep the run of the wall clean.
One detail worth knowing before you buy anywhere in the UK, EU or US: quality concealed cisterns are built to recognised standards — EN 14055 for WC flushing cisterns in Europe, WRAS approval in the UK, and WaterSense / ASME A112.19.2 in the US. Checking for these is the simplest way to be sure the cistern inside your wall is reliable and water-efficient, because once it's tiled over, it's the one part you don't want to second-guess.
Types of Concealed Toilet Cisterns
Every concealed toilet cistern does the same job — it hides the tank in the wall or in a unit — but the type you need is decided by the pan it has to support and where the weight is carried. That's the simplest way to tell them apart: a wall-hung pan puts your weight onto a steel frame inside the wall, while a back-to-wall or furniture-based pan still rests on the floor. Get that distinction right and the rest of the choice falls into place. There are three main styles.
1. Wall-Hung Toilet Cisterns
A wall-hung setup (also called wall-mounted in the US) suspends the pan completely off the floor, with nothing touching the ground and only a flush plate on show. Because the pan is floating, it must be paired with a supporting frame — a galvanised-steel structure, known as a mounting frame in the UK/EU and a carrier in the US, that bolts to the floor and wall and takes the full load of the pan plus the person using it. This is the one non-negotiable of the wall-hung route: the frame, not the floor, holds everything up, so quality matters. Look for a frame tested to support around 400 kg (roughly 880 lb) — the industry benchmark for a reliable in-wall system.
In return, you get the two things this style is famous for. Easier floor cleaning — with the pan lifted clear, you can mop straight underneath with no base, rim or awkward corner to trap grime. And a genuinely modern appearance — the floating profile and hidden cistern give the sleek, minimalist look you'll see in luxury hotels and high-end bathrooms, and it makes a small room feel noticeably more open. The trade-off is installation: the frame has to go in before the wall is boarded and tiled, so wall-hung is best suited to renovations and new builds rather than quick retrofits.
2. Back-to-Wall Toilet Cisterns
A back-to-wall pan sits on the floor with its rear flush against the wall, and the cistern hidden behind it — either inside a stud wall or tucked into a furniture unit. It's the versatile middle option, and by far the most popular for everyday homes. Because the pan carries its own weight on the floor, it doesn't need a load-bearing frame, which makes installation considerably simpler and more retrofit-friendly: in many bathrooms a plumber can swap out an old close-coupled toilet for a back-to-wall one in around half a day, without opening up structural walls.
That practicality is exactly why back-to-wall cisterns are so popular in family bathrooms. They deliver the clean, streamlined, easy-to-clean look of a concealed cistern — no exposed pipework, no gap behind the pan collecting dust — but at a lower cost and with far less disruption than a wall-hung installation. For busy households that want the modern finish without a full re-build, it's usually the sensible pick.
3. Furniture-Mounted Cisterns (WC Units)
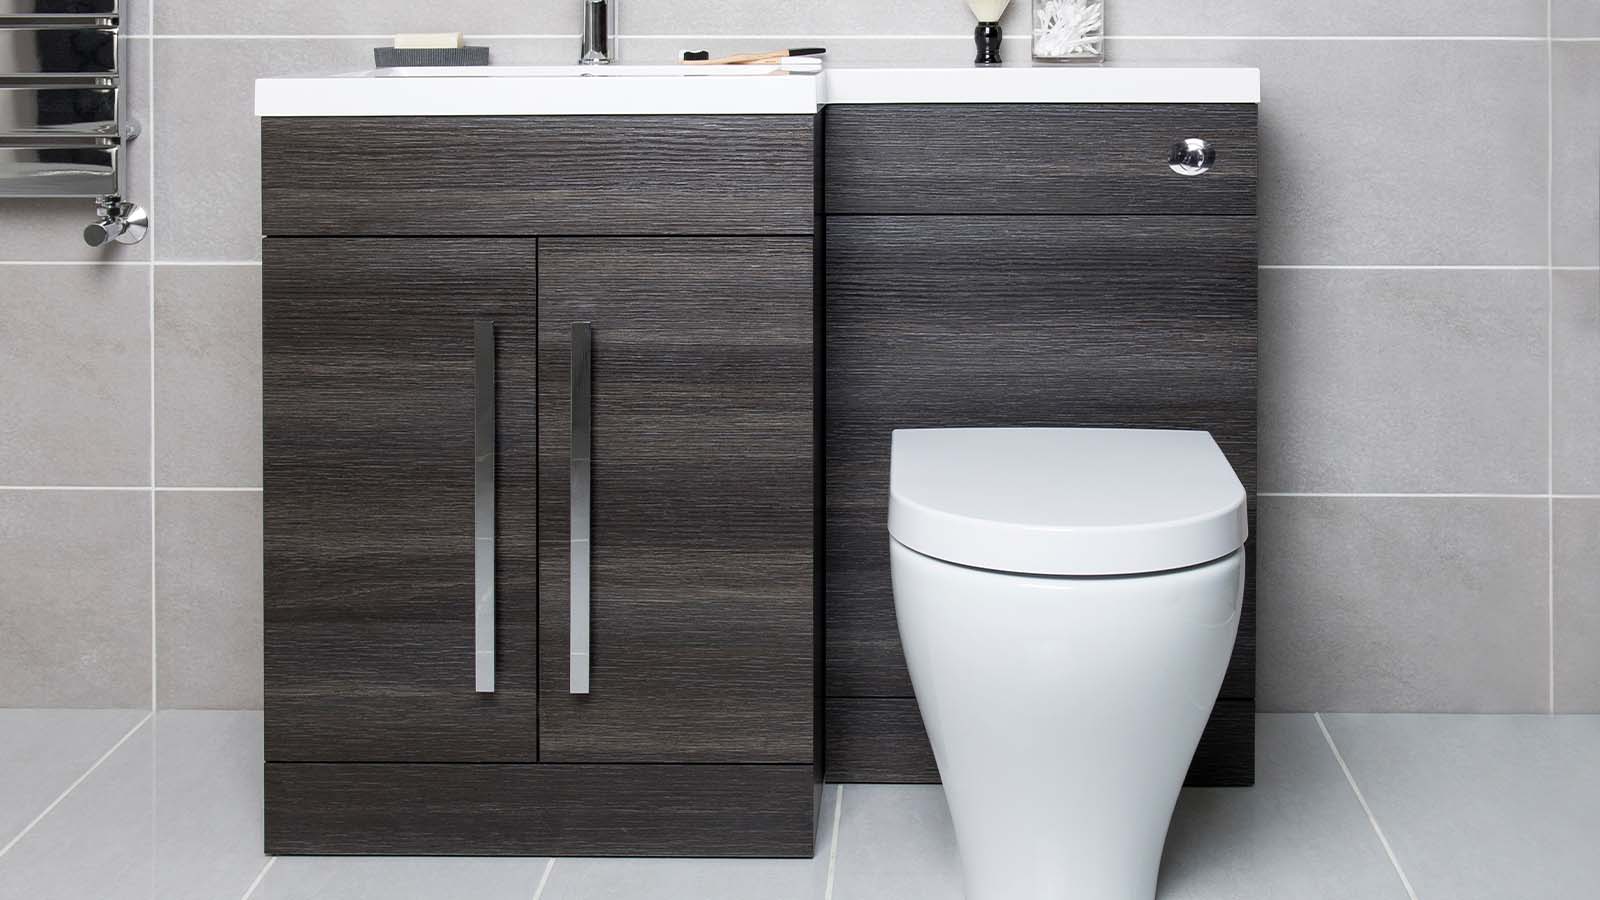
The third style hides the cistern inside a bathroom furniture unit — a WC or vanity unit — rather than building it into the wall. This is the route to choose when cutting into the wall isn't practical, which makes it ideal for solid-wall homes where there's no stud cavity to work with. It typically uses a back-to-wall pan fixed to the front of the cabinet, with the cistern concealed inside and a flush plate on the top or front.
Two things make furniture-mounted cisterns especially handy. They're perfect for cloakrooms and small en-suites, where a compact unit can also add a worktop or a little storage in a space that has none to spare. And they offer the easiest maintenance of all three types — because the cistern sits inside a cabinet with a removable panel (or under a liftable top), servicing the fill valve, flush valve or supply is quick and doesn't involve going anywhere near a tiled wall.
Which type should you choose?
As a rule of thumb: pick wall-hung for a premium, floating, minimalist look if you're renovating and can build the frame in; choose back-to-wall for the best balance of style, cost and easy installation in a family bathroom; and go furniture-mounted for solid-wall homes, cloakrooms, or anyone who wants the simplest access for future repairs.
One point that's rarely explained in the showroom but worth knowing before you buy: serviceability differs by type. Furniture and back-to-wall units give quick access behind a panel or flush plate. Wall-hung cisterns are also serviced through an access panel behind the flush plate for everyday parts, but if the frame fixings themselves ever fail, you may need to open the wall — which is why buying a quality frame and cistern from the start pays off most on this style.
Choosing the Right Size
Sizing a concealed cistern comes down to just two measurements, and everything else follows from them: the depth available behind the wall (this decides whether you need a standard or slimline unit) and the height you want the flush plate (this decides your frame size). Measure those two things first and the choice becomes simple. Here's how the numbers break down.
Standard concealed cistern sizes
A standard concealed toilet cistern is designed to sit inside a normal stud partition or a furniture unit, and comes packaged as a cistern plus a supporting frame. These are the typical dimensions you'll be working with:
Dimension | Standard cistern | Slimline / shallow cistern |
Cistern depth | ~180–220 mm (7–8.7 in) | ~75–120 mm (3–4.7 in) |
Overall width | ~500–520 mm (≈20 in) | ~500–510 mm (≈20 in) |
Cistern height | ~500–600 mm | ~500–570 mm |
Frame heights available | 820 mm / 980 mm / 1120 mm | 820 mm / 980 mm / 1120 mm |
Leg height adjustment | typically 0–200 mm | typically 0–150 mm |
Nearly all quality frames are height-adjustable at the feet (usually up to 200 mm), so you can fine-tune the finished level on site. Standard-depth cisterns are the most robust and cost-effective option, so if you have the wall depth to spare, there's rarely a reason to pay more for slim.
Slimline concealed cisterns (for tight walls)
When wall depth is limited, a slim concealed toilet cistern solves the problem. A shallow concealed cistern can be as slim as around 75 mm, with most models sitting in the 90–120 mm range. That reduced depth is the whole point: it lets you build a thinner false wall and claw back precious floor space. A compact concealed cistern is the standard specification for en-suites, cloakrooms and any small bathroom where every centimetre counts, and it pairs naturally with a wall-hung pan to keep the floor clear underneath.
The trade-off is minor but worth knowing: some very slim cisterns hold a slightly smaller header of water and can be marginally more particular about supply pressure, so always check the model's stated flush performance rather than assuming.
Sizing for compact bathrooms vs. large family bathrooms
Compact bathrooms: go slimline and, ideally, wall-hung. A shallow cistern in a thin false wall, with the pan floating above the floor, is the single most effective way to make a small room feel larger and easier to clean.
Large family bathrooms: you don't need to pay the slimline premium — a standard-depth cistern is more robust and cheaper. Here you can also use a lower 820 mm half-height frame, which lets you build a boxed-in ledge behind the toilet that doubles as handy shelf space — a practical touch that suits busy households. And because you have the depth, you can fit a full-height frame set for comfort-height seating, which brings us to the vertical dimensions.
Depth requirements — the number most people get wrong
This is the most important — and most overlooked — point in the whole sizing question: the cistern depth is not the same as your finished wall depth. A 90 mm slimline cistern does not mean a 90 mm wall. Once you add the frame uprights, the plasterboard and the tiles, the finished false wall is meaningfully thicker.
As a working rule, add roughly 50–70 mm to the cistern depth to get your finished wall build-up. So in practice:
A ~90 mm slimline cistern → a finished false wall of around 150 mm.
A ~200 mm standard cistern → a finished false wall of around 200–250 mm.
The practical takeaway: measure the actual space you have — the stud depth, or the internal void of your furniture unit — before you order, and choose the cistern to fit the wall, not the wall to fit the cistern.
Width and height considerations
Width is rarely the constraint, since most cisterns are around 500 mm wide, but do check clearance if the toilet is going into a tight alcove or between fixed units.
Height is where you get to tailor comfort. Standard adjustable frames come in roughly 820 mm, 980 mm and 1120 mm versions, and the finished flush-plate height typically lands about 1,000 mm from the floor — a comfortable reach for most adults. The bigger benefit of a full-height frame is that it lets you set the bowl height: a standard seat sits at roughly 400–420 mm from the floor, while a comfort height of 450–480 mm makes sitting and standing easier — a real advantage for taller users, older family members, or anyone planning an aging-in-place bathroom. (In US commercial installs, this is also where ADA mounting heights come into play.)
Get these two measurements — available depth and desired flush-plate height — right from the start, and you'll pick a concealed cistern that fits first time, with no costly surprises once the wall is tiled over.
Wall Type Matters
Before you buy, it's worth understanding how your wall affects the installation — because it changes how the cistern goes in, where it's hidden, and which frame you should choose. But first, the reassuring part that trips up most first-time buyers: installing a concealed cistern usually does not mean cutting a cavity into your wall. Those installation videos showing a cistern buried inside brickwork are the continental method; in most UK, US and European homes the cistern sits inside a shallow stud false wall built out in front of the existing wall. Once you know that, wall type becomes far less intimidating.
There's a second key point that removes a lot of worry: a quality wall-hung frame is self-supporting on its own adjustable floor feet, which bolt down to the floor. That means the wall behind it isn't doing most of the heavy lifting — the floor and the frame are. So the wall type mostly affects two practical things: how securely you can anchor the frame and where you build the enclosure. Here's how that plays out.
Solid walls (brick and block)
With a solid masonry wall, you generally bolt the frame to the existing wall for stability and build a stud false wall across the front to conceal the cistern and pipework — you don't chase a hole into the wall itself.
Fixing behaviour depends on the material: Brick and dense concrete block are excellent to fix into. Standard heavy-duty masonry anchors and frame bolts bite securely, giving you a rock-solid anchor point with no fuss.
Aerated or lightweight blocks (such as AAC / Thermalite) are the catch most people miss: standard wall plugs simply pull straight out of them. If your wall is a lightweight block, you'll need fixings specifically rated for aerated masonry, and it becomes even more important to use a floor-standing frame that carries the load on its feet rather than relying on the wall.
One structural caution worth stating plainly: never chase a cistern into a single-leaf load-bearing wall without professional advice. Cutting into a structural wall can require a lintel or engineered support, so if that's your only option, get a structural engineer or qualified builder to specify it. In almost every case, building out a false wall in front is the simpler and safer route anyway.
Stud walls (timber and metal)
A stud partition is the easiest and most common place to fit a concealed cistern, because the cavity is already there — but the golden rule applies to both types: never fix the frame to plasterboard alone. The board holds nothing; the fixings must land in something solid.
Timber studs are the most forgiving. You can screw the frame's brackets straight into the studwork, and where the frame's fixing points don't line up with a stud, you simply add timber noggins (also called dwangs) between the studs to create solid backing. Well-braced timber stud is an ideal host for a wall-hung frame.
Metal studs (C-studs, common in modern and commercial builds) are the one to watch: thin-gauge metal stud won't reliably hold load-bearing frame bolts. The standard solution is to add timber noggins between the metal studs for the frame to fix into, and to lean on a floor-standing frame whose feet carry the weight down to the floor rather than into the metalwork. Done that way, a metal-stud wall works perfectly well
Why this affects installation
Pulling it together, your wall type drives three real decisions:
Where the cistern goes — into an existing stud cavity, or into a new false wall built in front of a solid wall.
What fixings you need — standard anchors for brick and dense block; special fixings for aerated block; studs or added noggins for stud walls, never bare plasterboard.
Which frame to buy — and this is the practical takeaway. A floor-standing, self-supporting frame (one that bolts to the floor and carries the load on its own feet) is the safest universal choice, and it's especially recommended for solid walls, aerated block, and metal-stud walls. Wall-reliant bracket-only frames are best kept to properly reinforced timber stud walls.
Do You Need a Frame?
Whether you need a frame comes down almost entirely to one question: is your toilet pan wall-hung (floating off the floor) or back-to-wall (sitting on the floor)? Get that clear and the answer is straightforward.
First, though, it helps to clear up a common mix-up, because the word frame gets used two ways. A support frame is a load-bearing steel structure that physically holds the pan and the person using it. That's different from the stud boxing or false wall you build to hide a cistern — that boxing only conceals; it carries no weight. Understanding that difference is the key to this whole decision.
Frame-mounted cisterns
A frame-mounted (or framed) concealed cistern comes attached to a galvanised-steel support frame — known as a WC frame in the UK/EU and a carrier in the US. It bolts to both the floor and the wall, and it carries the full load of the pan plus the user, typically rated to around 400 kg when correctly installed.
This is essential for a wall-hung toilet. A floating pan has nothing beneath it, so the frame is the only thing holding it (and you) up — there's no frameless option for a wall-hung installation. Beyond being mandatory there, a framed system has real advantages: everything arrives pre-matched, so the fixing points for the pan sit in exactly the right place, the flush plate is compatible, and the parts are engineered to work together. It also lets you set the bowl at a comfort height, and buying a reputable branded frame means spare parts stay available for years. In short, it's the faster, more foolproof and more future-proof route — which is why it's the standard choice for wall-hung installs and works perfectly well with back-to-wall pans too if you want the extra rigidity.
Frameless cisterns
A frameless concealed cistern (often sold as a cistern only or in-wall cistern) is just the plastic cistern with its own fixing brackets — no load-bearing steel frame. It's fixed to a wall you already have or build, and crucially, the surrounding wall conceals it but does not support any body weight.
That makes it the natural partner for a back-to-wall toilet, where the pan rests on the floor and carries its own weight, so no structural frame is needed. It's the more economical, lower-profile option, and it suits retrofits, cloakrooms, under-stairs WCs, and furniture-unit installations where a full frame would be overkill. Two things to remember, though: the cistern's brackets must fix into solid studwork or noggins (never bare plasterboard), and you must leave proper access — to the isolation valve, the flush pipe and the base of the cistern — behind a removable panel or the flush plate before you tile over it.
Which do you need?
Frame-mounted cistern | Frameless cistern | |
Pairs with | Wall-hung (required) or back-to-wall | Back-to-wall / floor-standing pans |
Carries body weight? | Yes — steel frame on floor feet | No — pan sits on the floor |
Cost & profile | Higher cost, deeper build | Lower cost, slimmer build |
Best for | New builds, comfort-height, solid/metal-stud walls | Retrofits, cloakrooms, furniture units, budget jobs |
The simple rule: floating pan → you must have a frame; floor-standing pan → a frameless cistern is usually all you need.
One important warning to close on: if you've set your heart on a wall-hung toilet, don't try to save money by building your own timber support for it. Experienced installers strongly advise against it — a proper frame positions the pan bolts precisely and is tested to carry the rated load safely. Spend on a quality frame there, and save the frameless route for back-to-wall pans where it genuinely fits.
Flush Plates Explained
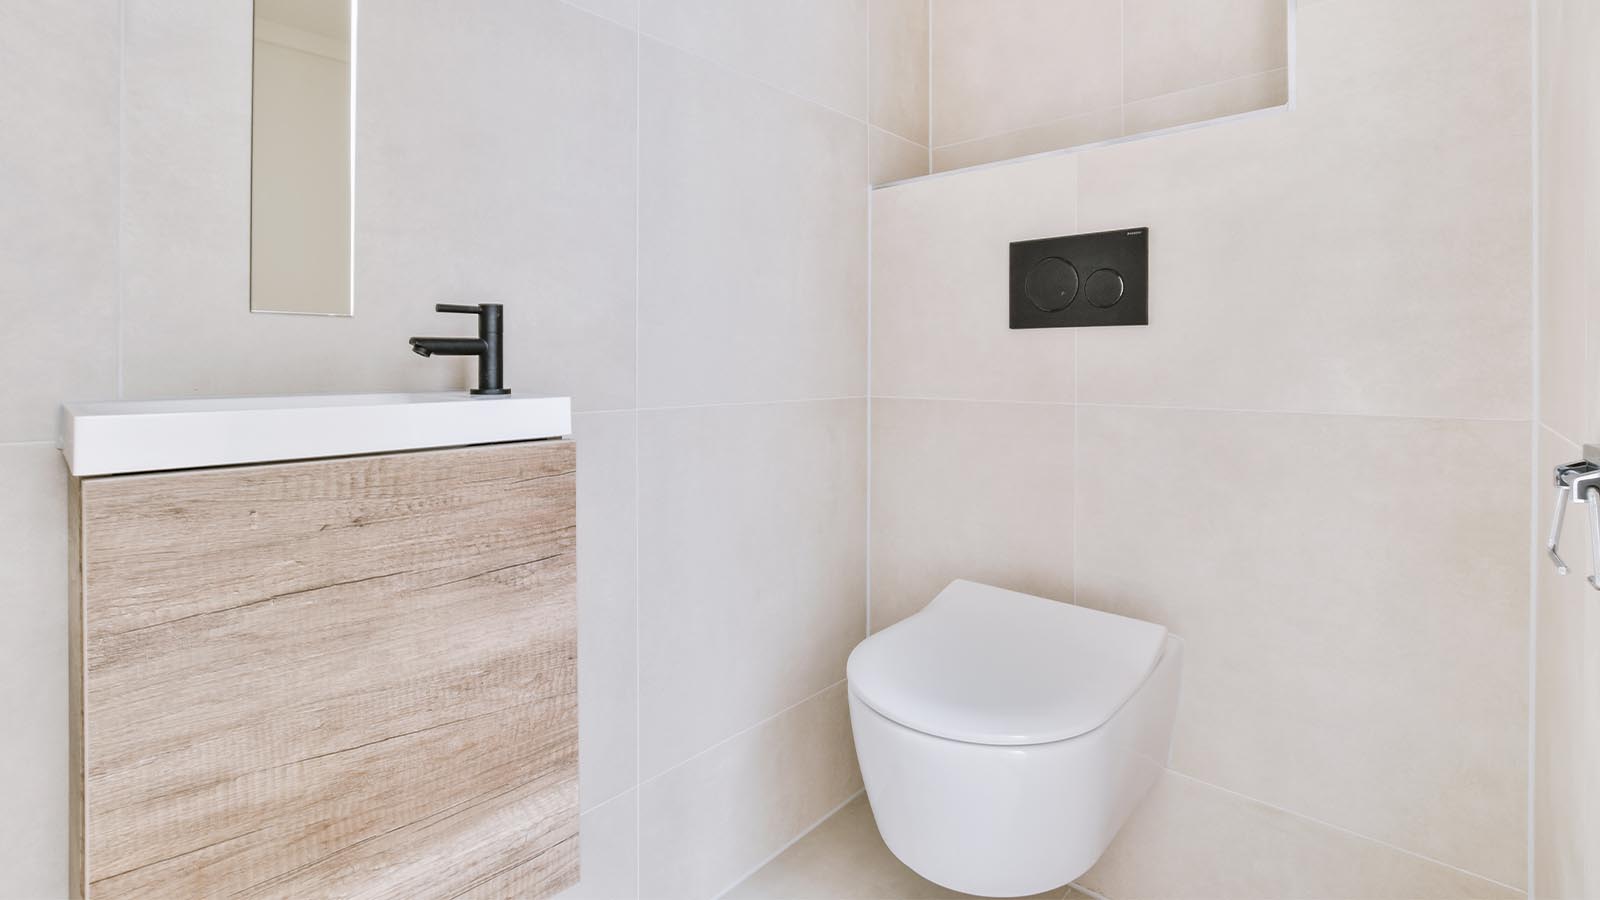
Here's something many buyers only discover at checkout: the flush plate is usually sold separately from the concealed cistern, and it is not universal. It's also the single part of the whole system you'll actually see and touch every day — and it doubles as the access hatch for servicing the cistern behind it. That makes the toilet flush plate both a design decision and a practical one, so it's worth understanding before you buy. (In the US you'll often see the same component called an actuator plate or flush actuator; in the UK and Europe it's a flush plate, operating plate, or push plate.)
Flush plate mechanisms
How the plate talks to the cistern's flush valve is the first thing to get right, because it must match the cistern.
Mechanical flush plates use a direct physical link — rods or levers — between the plate and the valve. They're simple, robust and reliable, but there's a catch: the plate has to sit directly in front of the cistern, which limits where it can go.
Pneumatic flush plates trigger the flush using air pressure sent down a small tube. Because the connection is an air line rather than a rigid rod, the button can be positioned far more freely — on the top of a unit, to one side, or set away from the cistern entirely. Pneumatic systems are also quieter and less prone to seizing over time, which is why they're a popular, low-maintenance choice.
Electronic (touchless) flush plates use an infrared sensor to flush hands-free when you wave over them. They need a power source (mains or battery) and sit at the premium end, but they're excellent for hygiene and are the go-to in high-traffic and commercial washrooms.
Single flush vs. dual flush
Single Flush plates have one button that delivers a full flush every time — simpler and cheaper, but less economical on water.
Dual flush plates have two buttons: a full flush (typically 6 litres) and a reduced flush (usually 3–4 litres), letting you use as little as half the water for liquid waste. A dual flush plate is now the standard, water-saving choice, and dual flush is a legal requirement in a growing number of regions — so unless you have a specific reason not to, this is the sensible pick. The concealed cistern flush button layout (two buttons, or a split plate) is what makes that water saving possible.
Compatibility — the part that catches people out
Flush plates are matched to specific cisterns, and a plate that merely looks right often won't fit. To avoid an expensive return, match three things:
Mechanism — a mechanical plate only works with a mechanical valve; a pneumatic plate only with a pneumatic one; electronic with electronic. These are not interchangeable.
Brand and range — plate families are tied to specific cistern series (for example, Geberit's Sigma plates pair with Sigma cisterns). You generally can't mix a plate from one manufacturer with another's cistern unless it's explicitly stated as compatible.
Actuation position and build depth — check whether the cistern is front-access or top-access, and match the plate to it, along with the cistern's depth/series (e.g. 120 mm vs 150 mm ranges). This is also where you should think ahead: since the plate is your future service access, choose front or top based on how you'll physically reach the cistern — for instance, a top plate above a furniture unit, or a front plate behind a mirror.
If you're replacing a broken plate rather than buying new, identify your existing cistern's brand and model first — that dictates which plates will fit.
A final practical note: because the plate is a separate purchase, budget for it. Basic chrome or white plates are inexpensive, but designer finishes — brushed brass, matte black, tempered glass — can add a meaningful amount to the total. The safest approach is to buy the cistern and plate together as a matched set (many are sold as packs for exactly this reason), so compatibility is guaranteed and you're not hunting for a plate that fits after the wall is already built.
Water Efficiency
A concealed cistern isn't just about looks — it's one of the easiest places in the home to cut water use. Here's how the water saving actually works, what the rules require, and what it means for your bills.
How dual flush systems save water
A dual flush cistern gives you two options: a full flush (typically 6 litres) for solid waste, and a reduced flush (usually 3 or 4 litres) for liquids. Choosing the smaller flush saves roughly 2 litres of water every time, which adds up fast over a year. There's a rule worth understanding behind the numbers: in the UK, the reduced flush must be no more than two-thirds of the full flush — so a 6-litre full flush pairs with a reduced flush of 4 litres or less. That's why you'll see cisterns sold as 6/4L or the more water-efficient 6/3L, and some models now go further still, down to around 4.5/2.5 litres.
But there's a catch competitors rarely mention, and it directly affects how much you actually save. WRAS research found that as many as eight in ten people press the wrong button on some confusingly designed dual-flush plates — using the full flush when they meant to use the reduced one, and quietly wasting the water they were trying to save. The practical takeaway when you buy: choose a flush plate with two clearly distinguishable buttons (an obvious large/small or clearly marked split), so the water-saving actually happens in daily use. It's a small detail that makes the difference between a dual flush that saves water and one that doesn't.
WRAS approval and UK regulations
In the UK, toilet flushing is governed by the Water Supply (Water Fittings) Regulations 1999. Since 1 January 2001, every newly installed WC suite must deliver a maximum flush of 6 litres — down from the older 7.5-litre and 9-litre systems many homes still have. The same regulations reintroduced dual flush (which older byelaws had banned) with the two-thirds rule above.
This is where WRAS approval matters. A WRAS-approved cistern has been independently tested to prove it complies with these regulations — covering not just flush volume, but also durability, correct internal marking of the flush line, and, importantly, backflow prevention (an air gap that stops cistern water contaminating the drinking-water supply). So choosing a WRAS-approved product isn't only about water saving; it's about buying a fitting that's certified safe and legally compliant. And it's worth knowing that these standards are being kept current: the approved specifications behind the regulations are being updated, with revised WC suite performance and backflow specifications taking effect from 6 May 2027 — another reason to buy a properly approved cistern now, so your bathroom is future-proofed against the rules.
The same principle applies across your other markets. In the US, the EPA's voluntary WaterSense label marks toilets using 1.28 gallons per flush (4.8 litres) or less — well below the federal 1.6-gpf maximum. In the EU, the Unified Water Label rates efficiency and cisterns are built to standard EN 14055. Whichever region you're in, the certification label is the quickest way to confirm a cistern is genuinely water-efficient.
What it means for your water bills
The savings are real, but let's be honest about the numbers. Swapping an old 9-litre single-flush toilet for a modern 6/3L dual flush can cut around 100 litres of water a day in a family of four — comfortably over 36,000 litres a year. On a metered supply, at typical UK combined water-and-sewerage rates, that translates to roughly £100 or more off your annual bill for a family home, and it compounds year after year.
The important caveat most lower your water bills claims skip: this only becomes a direct saving if your home is on a water meter. If you're billed on rateable value (unmetered), you'll conserve water — which still matters for the environment and in water-stressed regions — but you won't see the money back on your bill. If saving money is the goal and you're unmetered, it's worth checking whether a meter would benefit you before you count the pounds. Either way, a water-efficient concealed cistern paired with a clear dual flush plate is one of the simplest, lowest-effort upgrades you can make for both the planet and, for metered homes, your wallet.
Noise Levels
If you've ever been woken by someone flushing at 3am, you'll know why quiet flushing toilets is such a common search. The useful thing to understand before you buy is that toilet noise doesn't come from one place — it comes from three separate sources, and each has its own solution: the flush (water leaving the cistern), the refill (water coming back in), and the seat (the lid dropping). A concealed cistern already has a head start, because sitting behind a wall muffles the sound — but here's how to make each part genuinely quiet.
Insulated cisterns
The first advantage of a concealed cistern is structural: with the tank hidden inside a stud wall or furniture unit, the wall itself absorbs much of the flush noise that an exposed cistern broadcasts into the room. You can take this further. Some concealed cisterns come with a layer of insulation around the tank, which both reduces noise transmission and helps prevent condensation. And during installation, adding acoustic insulation (sound-deadening board or mineral wool) inside the wall void, and finishing with a solid tiled wall rather than a thin hollow panel, noticeably dampens the sound. If quietness is a priority, a well-insulated, solidly-built false wall is the foundation everything else sits on.
Quiet fill valves
This is the most important part, and the one most people overlook. The loudest and longest noise a toilet makes is usually not the flush — it's the refill, as the fill valve replaces the water. An old-fashioned ballcock or float valve can hiss, rush and dribble for two to three minutes after every flush. A modern quiet fill valve (or silent fill valve) does the same job in around 30–45 seconds, and does it quietly by keeping its outlet below the waterline so you don't hear splashing or rushing water, and by shutting off cleanly without the pipe banging that comes from an abrupt cut-off. The best examples run at under roughly 30–45 dB — around the level of a quiet library.
Two related features are worth looking for. A delay-fill (or delayed-action) function stops the valve from refilling until the flush valve has fully closed — which both saves water and concentrates the refill into one short, predictable burst rather than a drawn-out trickle. And many quality flush valves now include an adjustable throttle that lets you tune the flush flow rate to your pan, which cuts down the splashing sound inside the bowl. If you remember one thing from this section, make it this: a good quiet fill valve is the single biggest upgrade for a peaceful bathroom.
Soft-closing mechanisms
It's worth being clear about what soft close actually does, because it's often misunderstood. Soft close is a feature of the toilet seat and lid — not the flush. A soft-close hinge lets the lid and seat lower slowly and silently instead of dropping with a bang, which is a genuine and separate source of night-time noise (especially in a household where the lid gets closed after every use). If your concealed cistern is paired with a furniture unit, the same applies to soft-close drawers and doors on the cabinet. So while soft close won't make the flush any quieter, it does eliminate one of the most jarring bathroom sounds — the slam.
Night-time flushing
Put these together and a late-night trip to the bathroom stops waking the house. For the quietest possible night-time flush, combine a silent fill valve with a delay-fill function (so the refill is brief and near-inaudible), a soft-close seat (so there's no slam), and a well-insulated wall (so the flush itself stays muffled). A pneumatic flush plate helps too, as it operates more smoothly and quietly than a cable-driven mechanism.
One practical placement tip competitors rarely give: if you're planning the layout, try not to back the toilet directly onto a bedroom wall — and if the layout forces it, add acoustic insulation to that specific wall. It's a small consideration at the design stage that pays off every night afterwards. Between the muffling of a concealed cistern and the right quiet-running valves, a modern setup can get remarkably close to a genuinely silent flush.
Access for Maintenance
Let's tackle the fear directly, because it's the number-one worry people have about concealed cisterns: If it breaks, will I have to smash out the tiles? The reassuring truth is no — for the vast majority of repairs, you'll never touch a tile. Concealed cisterns are specifically designed to be serviced from the front, through the flush plate. But it's worth understanding exactly what that access does and doesn't reach, because that's where good planning (and a good brand) makes all the difference.
Access through the flush plate
The flush plate isn't just decorative — it's the service hatch. To get in, you turn off the water at the isolation valve, empty the cistern, and unclip the plate (most simply pull or lever off, though pneumatic plates have air tubes and cable plates have a cable to unhook first). Behind it sits a debris or protection panel, which lifts or unclips out — sometimes it's held by the flush rods, which you turn anticlockwise to release. With that off, the working parts of the concealed cistern are right in front of you through the opening. On a quality cistern, this single aperture gives you access to everything you'd routinely need to service — no wall involved.
Replacing valves
Maintenance on a concealed cistern almost always comes down to two parts, and both are reached through the flush plate:
The flush valve (drop valve) seal — the rubber washer that seals the flush. A worn one is the classic cause of water constantly trickling into the bowl. The whole drop valve usually twists out anticlockwise and lifts out in your hand; you swap the washer (or the valve) and refit.
The fill (inlet) valve — its diaphragm is the usual culprit behind a toilet that runs on, refills slowly, or won't stop. It clips out and replaces easily.
These parts are cheap (a replacement flush valve is often around £20) and quick to change. And here's a tip competitors rarely give: nine times out of ten you don't need a new part at all — limescale and debris build up on the valves, and a clean restores full function. Just avoid bleach or bleach-based cleaners, which damage the rubber seals; a soak in limescale remover is the safe choice.
Now the honest part. What the flush plate can't reach are the parts below the cistern — the inlet supply hose, the isolation valve (if it was fitted outside the cistern), and the flush pipe connection to the pan. If one of those fails, front access isn't enough. That's exactly why the install decisions from earlier matter: relocating the isolation valve inside the cistern before tiling, and leaving a removable panel or a gap behind a back-to-wall pan, means even those rarer repairs don't require breaking into the wall.
Future repairs
Realistically, a cistern's seals may need attention every several years — not if but when — so the goal is to make that a 20-minute job rather than a demolition. In practice there are three ways to reach a cistern: through the flush plate (the everyday route), through a removable panel or worktop above it (common on furniture units — many installers fit a quick-release top or a discreet stainless strip over a cut), and, only as an absolute last resort, by opening the boxing. The homes that end up in that last category almost always got there through poor install planning, not because of the technology. So the single best thing you can do for future repairs is insist, at the design stage, on proper flush-plate access plus a planned route to the under-cistern parts. Full replacement is rarely needed — but if it ever is, a concealed cistern swap typically runs around £150–£300 including labour.
Why quality brands matter
This is where spending a bit more genuinely pays off, and it comes down to one word: parts. A cistern is only as fixable as the availability of spares to fix it with. The bottom line: the tile-removal fear is understandable, but it's almost entirely avoidable. Get a thoughtfully planned installation with proper access, choose a cistern from a brand that guarantees spares for the long haul, and a concealed cistern is no harder to live with than a standard toilet — just far better looking.
Which Bathroom Is It For?
The best concealed cistern isn't universal — it depends entirely on the room. Here's how the priorities shift from one bathroom to the next, and what to choose for each.
Ensuite
An ensuite has two defining constraints: it's usually small, and it's usually next to a bedroom — which means noise matters as much as space. So this is where you combine a slimline concealed cistern with a wall-hung pan to free up floor and make a tight room feel larger, and prioritise quiet running. Choose a cistern with a silent fill valve and delay-fill function, pair it with a soft-close seat and a pneumatic flush plate, and if the toilet backs onto the bedroom wall, add acoustic insulation to that wall. In an ensuite, the quiet features aren't a luxury — they're the difference between a 3am flush that wakes your partner and one that doesn't.
Family bathroom
The priorities here are durability, easy cleaning and value under heavy daily use. A back-to-wall pan with a standard-depth cistern is often the sensible choice — robust, cost-effective and simple to fit — though a wall-hung setup is worth it if you're renovating, because being able to mop straight under the pan is a real win with children around. Two practical pointers specific to family life: fit a dual flush plate with clearly distinguishable buttons (remember that most people press the wrong one on confusing designs — and kids more so), and skip delicate tempered-glass plates in favour of a hard-wearing stainless or chrome plate that survives constant use. Buy from a quality brand, too: high usage means the seals will eventually wear, so long-term parts availability matters most here.
Cloakroom
A downstairs cloakroom or powder room is typically tiny, often built against a solid wall or under the stairs, and guest-facing. That combination points to a furniture-mounted cistern or a compact back-to-wall setup. A furniture unit is ideal where there's no stud cavity to build into (solid walls, under-stairs WCs), needs no wall-cutting, adds a sliver of worktop, and gives easy front access. A frameless, cistern-only approach frequently fits the bill here too, since the pan sits on the floor and no load-bearing frame is needed. Because guests see this room, it's worth spending the small extra on a smart-looking flush plate — it's the one design detail on show.
Accessible bathroom
Accessibility is where the requirements become specific, and a concealed cistern is genuinely well-suited to it. Under UK Approved Document M / Part M (and the equivalent US ADA standards), the key figures are a seat height of 480 mm from the floor and, for wheelchair use, a 750 mm pan projection for side transfer — and an adjustable wall-hung frame lets you set that height precisely, while keeping the floor clear for easy, hygienic cleaning. Two features matter most. First, the frame gives you solid, engineered fixing points for grab rails — many are sold as Doc M packs with concealed grab-rail fixings, which a hollow stud wall alone can't safely provide (rails must withstand significant load). Second, and often overlooked: the flush must be usable by someone with limited dexterity — a standard small push button won't do. Specify a spatula/lever flush or a touchless infrared flush, positioned 800–1000 mm above the floor. For any genuinely compliant accessible installation, follow the current regulations and, ideally, involve an accessibility specialist.
Luxury bathroom
Here the priorities are seamless aesthetics, silence and longevity. Go for a wall-hung pan for that floating, five-star-hotel look, paired with a premium concealed cistern and a designer flush plate — brushed brass, matt black, tempered glass, or a discreet touchless plate. Choose a model for the quietest operation and the best long-term spares, add a rimless comfort-height pan, and consider integrated extras like a shower-toilet (bidet) function or a night light. One point worth stressing: in a bathroom you'll keep for fifteen or twenty years, don't let a cheap cistern undermine an expensive room — the brand that guarantees parts for decades is exactly the one to specify when the fit-out is this significant.
Quick reference
Bathroom | Top priority | Recommended setup |
Ensuite | Space + quiet (near bedroom) | Slimline cistern, wall-hung, silent/delay fill, soft-close, pneumatic plate |
Family | Durability, cleaning, value | Standard cistern, back-to-wall or wall-hung, clear dual flush, robust plate, quality brand |
Cloakroom | Tiny/solid-wall, guest-facing | Furniture-mounted or frameless back-to-wall, compact cistern, smart flush plate |
Accessible | Compliance + usability | Wall-hung frame at 480 mm, grab-rail fixings, spatula-lever or sensor flush |
Luxury | Aesthetics, silence, longevity | Wall-hung, premium cistern, designer/touchless plate, top brand, comfort-height rimless pan |
Features Worth Paying For
Here's the principle that should guide your budget: a concealed cistern is the one part of your bathroom you tile over. That changes the maths. On an exposed toilet, a cheap component that fails is a minor annoyance. On a hidden one, the same failure can mean labour, mess and damaged tiles — so features that look like nice-to-haves are actually the ones that pay for themselves. These are the six worth spending on.
Anti-condensation insulation. This is the feature most buyers have never heard of and shouldn't skip. A cistern full of cold water, sealed inside a warm wall, will sweat — and that condensation, forming where you can't see it, is a genuine cause of hidden damp, mould, and even rot in the studwork or damage to plaster. A quality cistern is wrapped in an insulating layer (often a few millimetres of foam or EPS) that stops it forming in the first place. As a bonus, the same insulation dampens flush noise. Because the problem it prevents is invisible until it becomes expensive, this is one of the smartest features to pay for on any concealed unit.
Adjustable flush volume: Cheaper cisterns give you a fixed flush; better ones let you tune both volumes — a full flush adjustable across roughly 4–7.5 litres and a reduced flush of 2–4 litres, often with an adjustable throttle to control flow. This matters for two reasons: you can dial in the minimum volume that still clears your particular pan reliably (saving water beyond the factory default and trimming a metered bill), and you can adapt to your local water pressure and hard-water conditions rather than being stuck with a one-size setting.
Easy installation brackets: Look for pre-assembled wall brackets, height-adjustable feet (typically 0–200 mm), a pre-fitted isolation/stop valve, a flexible supply hose, and multiple water-connection positions. These aren't just conveniences — quality systems install significantly faster , which directly reduces your plumber's labour bill and cuts the risk of a fitting error on a unit you can't easily get back into. Adjustable feet and flexible connection points also mean the cistern fits awkward layouts without improvisation.
Tool-free maintenance: The internals of a good cistern — the flush valve especially — are designed to twist or snap out by hand, no screwdriver required. When the seal eventually needs replacing (a when, not an if), tool-free parts turn that into a quick swap through the flush plate rather than a fiddly job that risks damaging components or needing a call-out. Given that you'll be servicing this behind tiles, ease of access is worth real money.
WRAS approval: This one is non-negotiable rather than optional. A WRAS-approved cistern is independently tested to prove it meets the water regulations — correct flush volumes, durability, and, crucially, backflow protection that keeps cistern water from contaminating your drinking supply. It's your assurance that the part you're burying in the wall is safe, legal and water-efficient.
Long warranties: A generous warranty signals manufacturer confidence, but the number that really matters is spare-parts availability. Read the terms, though: the cistern body might carry a 10-year warranty while the rubber seals and gaskets get 2 years, because seals are wear items. That split is normal and honest — what you're really buying is the long-term parts supply behind it.
A closing word of balance: not every premium add-on is essential — you don't need the most expensive designer flush plate for the toilet to work, and ultra-slim depth only earns its price if your wall actually demands it. But the six features above aren't cosmetic upgrades; they're the ones that quietly protect the investment you're sealing behind your tiles.
Common Buying Mistakes
Almost every expensive mistake with a concealed cistern traces back to the same root cause: treating it as a single product you buy off a shelf, rather than a coordinated system you're sealing behind tiles. Get that mindset right and these six mistakes — the ones that cause returns, botched fits and, occasionally, smashed tiles — are entirely avoidable.
1. Buying the wrong flush plate. Flush plates are not universal, yet plenty of people buy on looks alone and find the plate won't fit or won't actuate. To get it right, match three things: the mechanism (mechanical, pneumatic or electronic — they're not interchangeable), the brand/range, and the access position (front or top). And remember the plate is usually a separate purchase — budget for it up front rather than discovering the extra cost at checkout. Safest of all: buy the cistern and plate as a matched set.
2. Wrong frame size. Two things go wrong here. First, the wrong height — order a frame without thinking about where the flush plate and bowl should sit, and you end up with an awkward finished height that's a nightmare to change once fixed. Frames come in roughly 820, 980 and 1120 mm versions for exactly this reason. Second, the wrong pan compatibility — frames and pans use fixing centres of either 180 mm or 230 mm, and if they don't match, your chosen pan simply won't bolt on. Check the frame height against your desired bowl position, and confirm the bolt centres match your pan before ordering.
3. Forgetting maintenance access. This is the single mistake behind the whole you'll have to break the wall reputation. Sealing the cistern behind tiles with no access — or an opening that's too tight, or the isolation valve left outside the cistern and tiled over — turns a routine seal replacement into a demolition job. The fix is a set of decisions to insist on at install: a generous flush-plate opening, the isolation valve relocated inside the cistern before tiling, and a removable panel or gap to reach the parts below the cistern. Plan the access and you'll never touch a tile.
4. Choosing the cheapest option. A concealed cistern is the worst possible place to save £30. Cheap unbranded units are typically abandoned by their makers within a few years, so when a seal eventually fails, you can't source the part — and that's what forces people to open the wall or replace the whole unit. Because it's buried behind tiles, buy cheap, pay twice hits harder here than anywhere else in the bathroom. Spend on a brand that guarantees spare parts for the long term (25–50 years); it's the cheapest insurance you'll ever buy.
5. Not checking wall depth. People order a cistern without measuring the actual space, or assume the cistern's depth is the wall depth. It isn't. Once you add the frame, plasterboard and tiles, the finished false wall is thicker — as a rule, cistern depth plus roughly 50–70 mm. Order a standard-depth cistern for a thin partition and it won't fit; order slimline when you didn't need to and you've overpaid. Measure the real cavity first, and choose the cistern to fit the wall — never the other way round.
6. Buying incompatible parts. Mixing a cistern, frame, pan and plate from different systems is a recipe for parts that won't connect — misaligned waste pipes, mismatched bolt centres, or a plate that won't actuate the valve. Crucially, remember that only back-to-wall and wall-hung pans work with a concealed cistern in the first place. The reliable approach is to buy the whole assembly as a coordinated set, or to confirm each component is explicitly compatible — checking pan type, bolt centres, waste alignment and actuation type together.
A few more worth avoiding
Ignoring water pressure — concealed systems have a working range (commonly around 0.2–10 bar). Too little gives a weak flush; too much risks leaks. Check yours, and fit a pressure-reducing valve if needed.
Getting the install order wrong — always complete the plumbing and pressure-test for leaks before boarding and tiling, and fit the pan last.
Using the wrong fixings — anchor the frame with the hardware specified for your wall type, not random plugs, or the pan can work loose over time.
The through-line is simple: the technology is reliable, but the outcome depends on planning the access, buying quality, and checking compatibility. Avoid these mistakes and a concealed cistern is no more troublesome than a standard toilet — just far better to look at.
Best Concealed Toilet Cistern for Different Budgets
The best concealed cistern depends entirely on your budget and your bathroom. Prices below are rough guides for a frame plus cistern (the flush plate is usually extra, anywhere from around £40 for a basic plate to £300+ for a designer finish) — always check current pricing for your region and spec. Here's how the categories break down.
Best budget option. Expect roughly £80–150 / $120–200. At this level you're typically looking at a cistern-only unit or a basic frame kit. The best budget pick isn't the absolute cheapest — it's the cheapest one that's still WRAS-approved, dual flush, front-access, and from a brand that stocks spare parts. That last point is what separates a smart budget buy from a false economy: an unbranded bargain cistern that can't be repaired in three years costs far more than it saves.
Best premium option. Expect roughly £300–600+ / $450–800+. This is the fit it and forget it tier — a robust steel frame, the quietest fill valve, guaranteed spare parts for decades, and full backwards compatibility. It's the right choice when the cistern is going behind tiles you never want to disturb. Look for a high frame load rating, a silent/delay fill valve, and long-term parts availability.
Best for wall-hung toilets. Expect roughly £200–500+ / $300–700+. Here the frame is the star, because it carries the pan and the user. The best pick is a floor-standing steel frame rated to around 400 kg, with adjustable feet for precise height-setting and pan fixing centres that match your chosen pan (check 180 mm vs 230 mm). A frame that offers both top and front flush-plate access adds flexibility.
Best for back-to-wall toilets. Expect roughly £90–250 / $130–350. Because a back-to-wall pan sits on the floor and carries its own weight, you don't need a load-bearing frame — so the best pick here is often a quality frameless (cistern-only) unit with easy front or top access. Prioritise a reliable brand with a serviceable valve and available spares over frame strength you won't use.
Best slimline cistern. Expect roughly £120–300 / $180–420. The defining spec is depth: the best slimline units come in around 75–120 mm to fit a thin stud partition. But don't chase slimness alone — the best slimline cistern still delivers a full-strength dual flush (check the stated flush performance, since some ultra-slim tanks are more pressure-sensitive) and remains serviceable through the plate.
Best for small bathrooms. Expect roughly £120–350 / $180–450. This is where slimline meets space-saving: the best pick pairs a slim cistern with a wall-hung frame, freeing the floor and making a tight en-suite or cloakroom feel larger. If it's a cloakroom against a solid wall, a compact furniture-unit cistern is the better route. Prioritise depth, a quiet fill valve (small rooms often sit near bedrooms), and a clear dual flush plate.
Installation Tips
Installation is where a concealed cistern succeeds or fails. Because the whole system is sealed behind tiles, getting it right the first time matters more than with almost any other fixture — a mistake here isn't a quick redo, it's a demolition. Here's how to approach it.
DIY vs professional installation
Be honest about which type of install you're facing. A wall-hung setup is not a typical DIY job: the frame carries the full weight of the pan and the user, the waste and supply pipes run inside the wall, and any error is hidden until it's expensive. This one belongs with a professional. A back-to-wall or furniture-unit install (where the pan sits on the floor and no load-bearing frame is involved) is far more achievable for a confident DIYer.
But here's the point most guides miss: even hiring a professional isn't quite enough. Wall-hung concealed systems are still relatively uncommon, and plenty of general plumbers have little experience with them — leading to sloppy, leaking installs that have to be corrected by someone else. So don't just ask for a plumber; ask how many wall-hung concealed systems they've fitted. The right question up front saves an expensive re-do later.
Plumbing considerations
Three things drive a clean plumbing job. First, the waste connection: a concealed WC discharges into the wall (a 110 mm soil pipe in the UK/EU, a 3-inch waste line in the US) via the frame's connector. The recurring real-world pitfall is bends — the waste run has very little slack, and every extra 90° elbow hurts drainage. Aim for the fewest, gentlest bends possible to the soil stack; most frames allow the discharge elbow to be angled to help. Second, the water supply: usually a ½-inch feed with a choice of connection positions and a pre-fitted isolation valve — mount it so it stays accessible inside the frame, and always use the manufacturer's specified connectors and seals (a supply pipe even a few millimetres off-spec is a classic source of hidden leaks). Third, water pressure: concealed systems have a working range (commonly around 0.2–10 bar); too little gives a weak flush, too much risks leaks, so test it and fit a pressure-reducing valve if needed. Where pipes pass through studs, protect them with steel shield plates so a stray screw or nail doesn't pierce them when boarding.
Building regulations
Requirements vary by region, so confirm your local rules before you start — but the essentials are consistent. In the UK, fittings must comply with the Water Supply (Water Fittings) Regulations 1999 (this is what WRAS approval demonstrates). A straightforward like-for-like replacement usually needs no Building Control approval, but new bathrooms, relocations, or new drainage do — and if you're connecting a new WC to a public sewer, you'll typically need the water company's permission first, which Building Control will want to see before signing off. Two more UK-specific triggers: Part M applies to accessible installations, and Part P (electrical) applies only if you fit an electronic/sensor flush, which is notifiable work for a qualified electrician. Altering a load-bearing wall is also Building Regs territory. In the US, the International Plumbing Code effectively mandates a proper concealed carrier (so no strain reaches the waste connection), and most jurisdictions require a permit plus an inspection before the wall is closed — miss that and you may have to tear the finished wall back open. In the EU, look for EN 997 / EN 14055 compliance and CE marking. The common thread: sort out permissions and inspection timing before anything gets covered up.
Testing before tiling
This is the single most important rule of the whole install, and it's non-negotiable: pressure-test every connection for leaks before you board and tile over anything. The correct sequence is:
Fix the frame to the floor and wall, and run the supply and waste pipes.
Connect and pressure-test everything — fill the pan, turn on the supply, and check every supply and drain joint for tightness. Complete any required inspection at this open stage.
Cap and close — fit the protective bungs/caps to the flush and waste pipes, then board over the frame.
Tile, cutting the flush-plate and pan openings carefully — and keep the opening generous enough for future access.
Fit the pan last, connect it, and do a final leak check.
Fit the flush plate, confirming the cistern is still fully serviceable through it.
The reason this order is worth following to the letter: the flush-pipe joint is a classic hidden-leak spot, and once the toilet is pushed against a tiled wall you can no longer see whether that connection is weeping. Test it while everything is still open, and you'll never have to break a tile to find out.
A quiet commercial note that's also just good advice: a quality frame-and-cistern kit with clear instructions and the correct connectors supplied makes all of this considerably easier — and cuts the risk of the very mistakes that turn a hidden install into a demolition.